
Sticker books aren't just for kids; they're a fantastic way to unleash your creativity, organize your stickers for planning, or have fun. Whether you're a seasoned crafter or a newbie looking to undertake a new project, creating a DIY sticker book can be a satisfying and artistic endeavor. This guide will walk you through the process from start to finish, ensuring you have all the knowledge needed to create a stunning, personalized sticker book.
Why DIY Sticker Books?
Creating your sticker book has numerous benefits. It allows for complete customization in themes and designs, making it a perfect fit for personal use or as a tailored gift. Additionally, the process of creating a sticker book can be therapeutic, offering a creative outlet that helps reduce stress. It's also an excellent project for involving kids, teaching them basic crafting skills while engaging their creativity.

What You Need to Get Started
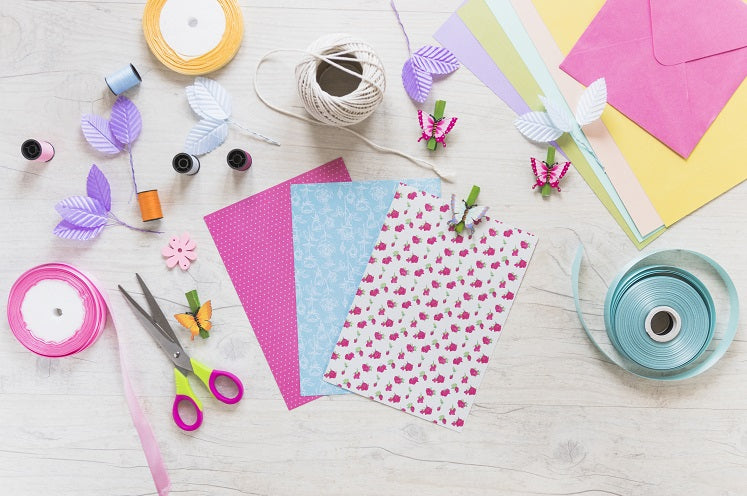
Before you dive into the making of your sticker book, it's essential to gather all the necessary materials. You will need:
- Paper (sticker paper, cardstock, or any specialty paper depending on your design needs)
- Adhesives (glue sticks, spray adhesive, or double-sided tape)
- Cutting tools (scissors, craft knife, or a cutting machine if you have one)
- Binding materials (spiral binder, rings, or even a simple hole punch and ribbon)
- Decorative elements (markers, washi tape, glitter, etc.)
How to Create a DIY Sticker Book
Creating a DIY sticker book can be a fun and engaging project, ideal for organizing your collection or even as a personalized gift. Here's how to get started:
Materials
To begin, gather all the necessary materials:
- Heavy-duty paper or cardstock for the cover and back.
- Wax paper is used for the sticker pages to protect them and allow easy removal.
- Hole punch.
- Ribbon, twine, or binder rings for binding.
- Stickers of various sizes and themes.
- Optional: Decorative materials such as markers, paints, glitter, and washi tape for personalization.

Step 1: Design the Cover
Start by selecting a sturdy cardstock for your cover to ensure durability and protection for your sticker collection. Add a personal touch by drawing, painting, or applying printed designs that showcase themes reflecting your interests or the essence of your sticker collection. Additionally, design the cover to be slightly larger than the inner pages, providing an extra layer of protection and giving your album a neat, polished look.
Step 2: Cover Pages on Wax Paper
Cut the wax paper to match the dimensions of your book pages, ensuring consistency for ease of use. This wax paper is ideal for stickers because it provides a surface that allows them to adhere while still being easy to remove without damage. By making each sheet uniform, you create a neat, stackable pile, facilitating organized storage and quick access when needed.
Step 3: Punch Holes Along the Side
Ensure all your pages, including the cover and back, are aligned perfectly to maintain a professional appearance. Use a hole punch to create holes along one side of the stack, pressing firmly to achieve clean cuts. Space the holes evenly to ensure the book remains both tidy and functional, allowing for easy page flipping.
Step 4: Bind Your Book
To bind your book, you can use ribbons, twine, or binder rings threaded through the punched holes. These options offer both practicality and aesthetic appeal, allowing for easy opening and the ability to adjust the book as your sticker collection expands. Whether you prefer the elegance of ribbons, the rustic charm of twine, or the efficiency of binder rings, each method ensures your sticker book remains versatile and functional.
Step 5: Fill in With Stickers!
Now for the fun part—start filling your book with stickers. Arrange them by theme, color, or any method you prefer. This book will not only organize your stickers but also showcase your collection beautifully.
Customizing Your Sticker Book
Personalizing with Themes
Themed sticker books cater to a variety of interests, spanning from festive occasions like Christmas or Halloween to niche hobbies such as animal lovers or travel enthusiasts. These specialized collections not only simplify the process of finding suitable stickers but also enhance the enjoyment of using them by adding an extra layer of thematic excitement to each selection. Whether you're decking out your planner or embellishing a scrapbook, themed sticker books offer a delightful way to express your personality and passions through colorful, coordinated designs.
Decorative Ideas for Sticker Books
Adding decorative elements like borders, backgrounds, or themed dividers can significantly boost the visual allure of your sticker book. Decorative tapes and stamps can introduce vibrant colors and interesting textures, transforming your sticker book into a captivating work of art. These enhancements not only elevate the aesthetic appeal but also contribute to a more engaging and personalized experience with your sticker collection.
Advanced Sticker Book Techniques
Waterproofing Your Stickers
Waterproofing is crucial for stickers intended for environments where they might get wet, such as planners, water bottles, or outdoor equipment. By applying a clear acrylic spray or laminating them with transparent adhesive sheets, you can significantly enhance their durability and resistance to moisture. This protective layer not only guards against water damage but also helps prevent wear and tear, ensuring the stickers maintain their appearance and adhesion over time.
Creating Reusable Stickers
Reusable stickers are a versatile option for planners, scrapbooking, or temporary decorations, offering flexibility and convenience. By backing these stickers with cling film instead of permanent adhesive, they can adhere to surfaces without leaving any sticky residue behind. This makes them easy to reposition and reuse on various smooth surfaces, enhancing their practicality for multiple uses.
Innovative Binding Methods
Explore different binding techniques to find one that suits your sticker book's style and function. Japanese binding adds an elegant, handcrafted touch, ideal for books meant to be displayed or cherished as keepsakes. On the other hand, coil binding offers practicality and ease of use, making it perfect for sticker books that will be frequently used and need to lay flat. Each binding style has its unique charm and benefits, ensuring your sticker book is both functional and visually appealing.
Fun Ideas to Fill Your DIY Sticker Book Pages
Play an Adjectives Game
Create an interactive learning experience with your sticker book by playing the adjectives game. Dedicate a few pages where a person can describe a sticker image using as many adjectives as possible. For example, place a sticker of a dog and have descriptions like "fluffy," "playful," or "brown" around it.
Tell a Sticker Story
Use stickers to tell a story. Start with a few on one page, sparking the beginning of an adventure or a scene. As you add more stickers on subsequent pages, the narrative unfolds, guiding children through the sequence of events and plot twists. This method captivates their imagination and enhances their understanding of how stories develop and flow from one part to the next.
Set an Exciting Scene
Use your stickers to set various scenes. This can be anything from a bustling cityscape to a serene beach scene. Mixing different sticker themes can spark creativity and allow for unique page designs. Each scene can serve as a fantastic backdrop for imaginative stories and adventures.
Maintaining Your Sticker Book
Best Practices for Sticker Book Care
To ensure your sticker book lasts, store it in a cool, dry place away from direct sunlight to prevent damage from heat and moisture. Handle the book gently, especially when using rings or spirals, as rough handling can cause tears or bent pages. Additionally, keep the book closed when not in use to protect it from dust and other environmental factors that could degrade the stickers and pages over time.
Repairing Damaged Stickers
Accidents are inevitable occurrences, yet they often present opportunities for repair. For instance, a torn sticker can easily be salvaged with a simple fix, such as applying a small piece of clear tape to its backside. Similarly, the lost stickiness of a sticker can be remedied with the application of double-sided tape, restoring its functionality and usability.

Innovative Uses of DIY Sticker Books
Educational Purposes
Sticker books serve as versatile educational resources, offering children hands-on engagement with colors, shapes, and organizational skills. Beyond fostering creativity and fine motor skills, they can be integrated seamlessly into school projects, enhancing visual presentations and promoting collaborative learning environments. These interactive tools not only captivate young minds but also empower educators to explore diverse teaching methodologies.
As Gifts
Personalized sticker books add a charming touch to any occasion, showcasing your attention to detail and thoughtfulness. By tailoring the stickers to the recipient's preferences, whether it's their beloved hobbies or cherished furry friends, you create a memorable and heartfelt present that speaks volumes about your relationship with them. With each sticker explicitly chosen for them, the gift becomes a delightful reflection of their personality and interests, making it all the more special.
Memory Keeping
Sticker books serve as vibrant canvases for crafting memories, offering a playful and creative approach to scrapbooking. They provide a dynamic platform to blend stickers, photographs, and personal musings, transforming ordinary pages into cherished chronicles of life's moments. In essence, sticker books become whimsical diaries, capturing the essence of each event with colorful embellishments and heartfelt annotations.
Marketing Your DIY Sticker Books
Crafting a Brand Around Your Sticker Books
When you decide to turn your hobby into a business, branding becomes crucial. Develop a unique name and logo that reflects the essence of your sticker books. Utilize social media to showcase your creations and tell the story behind your brand, which can connect you emotionally with your audience.
Selling Online
Online platforms like Etsy, eBay, and your e-commerce website are excellent places to start selling your sticker books. High-quality photos, detailed descriptions, and customer reviews are essential. Consider offering customization options, which can set your products apart from others in the marketplace.
Packaging and Shipping Tips
Proper packaging not only ensures that your sticker books arrive in pristine condition but also can enhance the customer experience. Use protective materials and include a personal thank-you note or a small free sticker as a bonus. For shipping, offer multiple options and include tracking to ensure customers can follow their purchase's journey.
FAQs About DIY Sticker Books
What is the best paper for DIY stickers?
The best paper for DIY stickers depends on your needs. Matte sticker paper is excellent for writing on and gives a classic look, while glossy sticker paper is ideal for vibrant colors and photo-quality prints. Vinyl sticker paper is the top choice for durability and water resistance.
How can I make my stickers last longer?
To extend the life of your stickers, consider laminating them, which adds a protective layer against water, scratches, and UV rays. Also, storing your stickers in a cool, dry place away from direct sunlight will help prevent fading and deterioration.
Can I make a sticker book with recycled materials?
Absolutely! Using recycled materials is not only eco-friendly but also adds a unique rustic charm to your sticker book. Old magazines, packaging, and even fabric can be repurposed into creative sticker designs. Ensure you have a suitable adhesive to handle the different textures.
Do I need special software to design stickers?
While professional software like Adobe Illustrator provides extensive features for design, free tools like Canva or GIMP are sufficient for most DIY projects. These tools offer user-friendly interfaces and plenty of design elements to get you started.
How do I bind my sticker book without a binder?
There are several ways to bind a book without traditional binding tools. You can use the Japanese bookbinding technique, which involves sewing pages together with thread. Alternatively, using rings or ribbons through punched holes can also be a practical and decorative method.
Is it possible to print stickers at home without a sticker printer?
Yes, you can print stickers at home using a regular inkjet or laser printer. Ensure you use the correct type of sticker paper for your printer. After printing, you should seal the ink with a clear spray to prevent smudging.
Conclusion
Creating your DIY sticker book is a rewarding project that combines creativity with practicality. Whether you're crafting for fun, education, or even starting a business, the possibilities are endless. Remember, the key to an excellent sticker book lies in the personal touch and the joy it brings both during and after its creation. Enjoy the process, and let your imagination lead the way!

